ONESOURCE
Workpapers Help
Functions: Set
Functions helps you build workpaper formulas, and you can use it for building Set formulas to push workpaper data into a ONESOURCE product. Workpapers uses two types of Set formulas depending on the ONESOURCE product you use. The Function Wizard detects your ONESOURCE product and automatically selects the appropriate type of formula:
- TRSetField: Pushes a single field into a ONESOURCE product in the Platform.
- TRSetRange: Pushes a range of fields into a ONESOURCE product in the Platform.
Follow these guidelines for formulas:
- TRSetField Formulas: The Add-in cannot send more than 3,400 TRSetField formulas at a time. If a workbook has more than 3,400 formulas, use the Send Selected Data function.
- TRSetRange Formulas: A SetRange formula cannot send more than 200,000 cells of data from the Add-in. If a formula needs to send more than 200,000 cells, use the Batches feature.
- Length: Formulas cannot exceed 8,192 characters.
- Volatile Functions: Formulas should not contain volatile functions, such as RAND(), NOW(), TODAY(), OFFSET(), CELL(), INDIRECT(), and INFO(). Volatile functions slow down Add-in calculations because each instance of these functions is executed when Excel recalculates.
- Nested Functions: Formulas should not contain nested functions since there are some limitations in calculations, including precedence chain calculations.
The three sections below explain how to create a Set formula using the wizard. Start by completing Initial Formula Steps, and then follow the steps in one of the remaining sections.
Initial Formula Steps
To start creating a Set formula with the wizard:
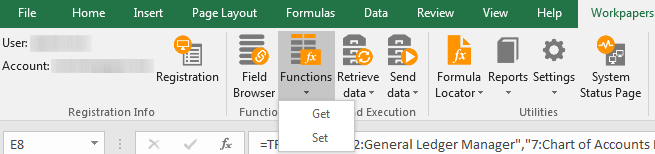
- On the Workpapers tab, select the Functions icon.

-
In the Function Wizard, select Set data in the first drop-down list, and then select components for remaining drop-down lists.
The number of drop-downs displayed depends on the ONESOURCE product you are using, and if you hover over the information icon in the lower-right, it displays the remaining fields you need to complete.
When you select values in the drop-down lists, reference codes—the actual values sent to ONESOURCE—are inserted directly into the formula. If you prefer to store and look up reference codes in workpaper cells, see Functions: References and Anchoring.
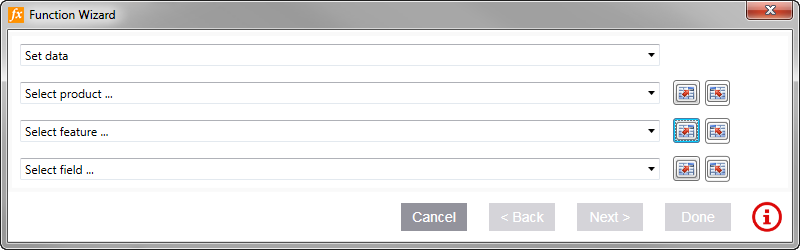
- Select Next.
- If you see fields under the heading Select Parameters, select values in each parameter drop-down list. Red asterisks indicate required values.
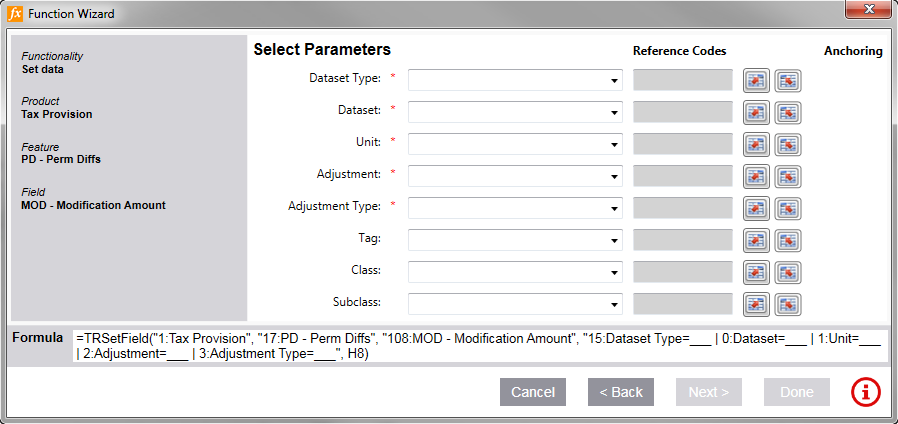
- Note at the bottom of the wizard whether the formula starts with TRSetField or TRSetRange, and then select Next.

- Remain in the wizard and follow the instructions below for your formula type:
TRSetField Steps
If the Set formula starts with TRSetField:
- Complete the following fields using the table below as a guide:
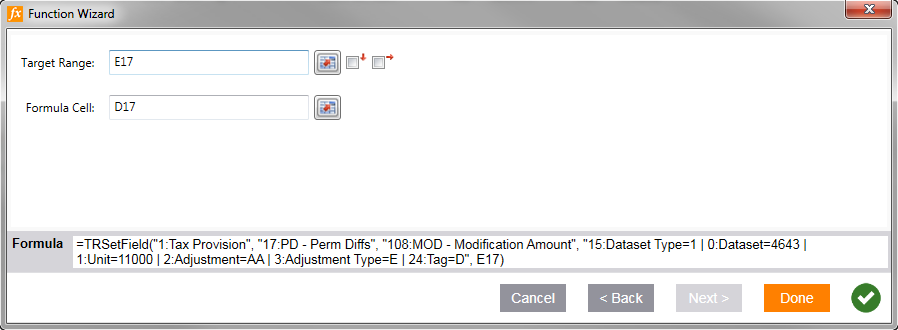
The information icon in the lower-right changes to a check mark when the formula is complete:

Field Description Target Range Specify the cell to push to the Platform. Select the cell in the worksheet or enter the cell location in the field. Since this is a TRSetField formula that only pushes data into one field, only specify one cell for Target Range.
Formula Cell Enter the location of the cell where you want the formula. 
To set up an anchor:
- Select the check box with the down arrow to anchor the column.
- Select the check box with the right arrow to anchor the row.
- Select Done.
The formula cell is updated with the current date and time. Also, the target cell is highlighted in orange for TRSetField formulas only.
TRSetRange Steps
If the Set formula starts with TRSetRange:
- Complete the following fields using the table below as a guide:
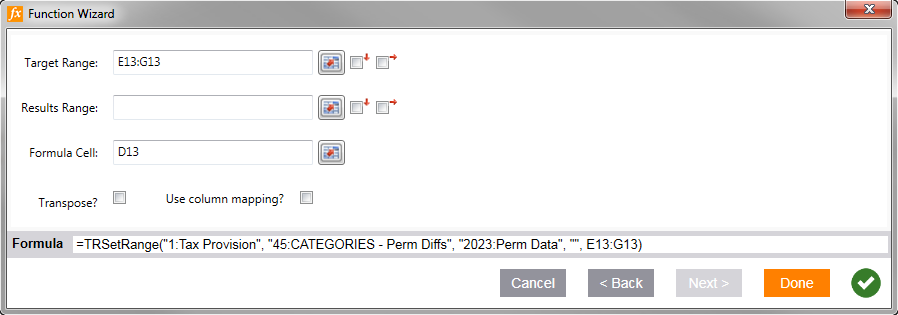
The information icon in the lower-right changes to a check mark when the formula is complete:
Field Description Target Range Target Range: Set the range of cells to push to the Platform. Select cells in the worksheet or enter the cell locations in the field. For TRSetRange, you must specify a cell range—not an individual cell.
Results Range (product specific) Specify the cell, cells, or row to display any error messages. To see error messages, you must also select Disable the validation of data types for TRSetRange formulas in Add-in Settings > Calculation. To set up an anchor:
- Select the check box with the down arrow to anchor the column.
- Select the check box with the right arrow to anchor the row.
Formula Cell Enter the location of the cell where you want the formula. Transpose Select this option if you want to switch the layout of the results from rows to columns (or columns to rows). Use Column Mapping? (product specific) Select this option to specify which fields receive your workpaper data. - Select one of the following buttons:
- Done: If you did not select Use column mapping, select Done to finish and exit the wizard.
- Next: If you selected Use column mapping?, select Next to see mapping options.
- Select My table has headers if your Target Range includes headers, and then using the drop-down lists, map each of your columns to a field in the application.
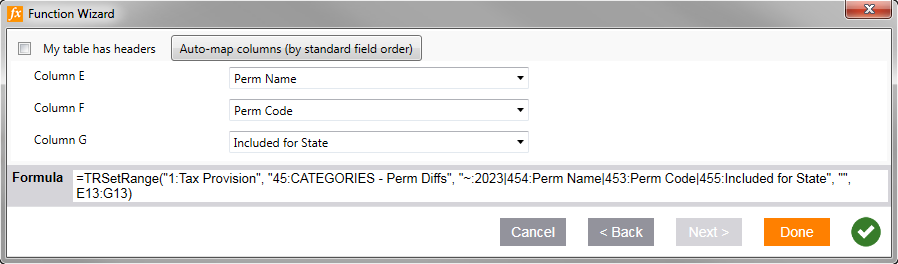
- Select Done.
The formula cell is updated with the current date and time. The target cell is not highlighted in orange for TRSetRange formulas.